Get the latest information on what is happening in Joey's Scrap Room so you can join the fun.
Wednesday, January 26, 2011
Saturday, January 22, 2011
Workshop Weekend: Pennant Banner
 For my January Workshop Weekend we will create a mini-album using the My Creations Banner. The cost of this workshop is $20.00. This is a new and trendy album. It includes 8 chipboard pages and 7 jump rings. The pages are 7 x 6. Since I made my banner into an album I used 1 inch jump rings to hold the album together. I used a variety of 5x6; 4x6 and wallet size photos. Attendee will also learn how to create faux pleated ribbon as well as create a flower out of pleated ribbon. I uses a lot of embellishments and my album ended up a little bulky. I also used a lot of 3D foam tape to add dimension to my photos and embellishments.


Wings Level 2 Paper Packet
EXCLUSIVE Wings Kit Acrylix Stamp Set
C1440 Take A Picture Acrylix Stamp Set
E1019 Bohemian Alphabet Acrylix Stamp Set
Buttons Green Assortment
Designer Ribbon Rounds: Colonial White
Designer Ribbon Rounds: Black (retired)
Vineyard Berry Ribbon (retired)
Colonial White Grossgrain Ribbon
Embroidery Floss: Neutral Assortment
Embroidery Floss: Neutral Assortment
Sparkles: Blue & Green Assortment
Just Blooms Paper Flowers
Just Blooms Pinks (retired)
Mini-Medley Accents Collection: Black
Sponge Daubers
Liquid Glass
StazOn Ink: Black (to ink distress my photos)
Texture Tools (Foam Tools)
Microtip Scissors
3D Foam Tape
Plenty of Adhesive!!!
Sunday, January 16, 2011
January weekend workshop ...
I just completed the banner book for this months weekend workshop. Details to come .....
Published with Blogger-droid v1.6.5
Sunday, January 9, 2011
Santa Visits!!!
My 2010 Christmas Card


I would like to share with you my 2010 Christmas Card. I was not able to create cards last year, since my Uncle was in a car accident in November and was laid to rest on Christmas Eve. Even though I would take my supplies and work on them while I would sit in the waiting room, they were never completed. So this year I wanted to make my cards special. I used the C1427 I Believe stamp set. There are alot of things I believe in: Love, Hope, Karma, and of course.....Santa!!! Without the jolly 'ole man, gifts could not be delivered to children all over the world. (Yes, I still Believe!)
Products used:
Creative Basics: Mistletoe
New England Ivy Cardstock
Cranberry Cardstock
Bamboo Cardstock
Chobolate Ink
Prismta Glitter
Bonding Memories Glue Pen
Opaques: Pearl
Cranberry Brads
Microtip Scissors
3-D Foam Tape
Originals:
Heartfelt Classic (pg. 71)
C1427 I Believe
D1388 Card Chatter - Christmas
Workshop Weekend: Christmas Cards
 In December the Weekend Workshop was 12 Christmas Cards for $15.00. There were 3 designs (4 cards per design). We had a lot of deminsion on each card. They turned out fabulous, if I do say so myself!!!
The Reindeer Card:
Mistletoe Level 2 Paper Packet
New England Ivy Cardstock
Cranberry Cardstock
Colonial White Cardstock
Chocolate Ink
Cranberry Ink
Sparkles: Red
Opaques: Pearl
Sponge (for distressing)
Prisma Glitter
Bonding Memories Glue Pen
3-D Foam Tape
Sanding Kit
Microtip Scissors
Wishes: Just Right (pg. 39)
C1427 I Believe
B1361 Tannenbaum
The Scripture Card:
Mistletoe Level 2 Paper Packet
Creative Basics: Mistletoe Ribbon
Cocoa Cardstock
Cranberry Cardstock
Colonial White Cardstock
Chocolate Ink
Opaques: Mocha
Sponge (for distressing)
Sanding Kit
Wishes:
Sentiment Secured (pg. 78)
D1440 Everlasting Life
The Christmas Tree Card:
Mistletoe Level 2 Paper PacketCocoa Cardstock
Creative Basics: Mistletoe Ribbon
Cocoa Cardstock
Cranberry Cardstock
Colonial White Cardstock
Chocolate Ink
Olive Ink
Opaques: Pearl
Sparkles: Red
Sponge (for distressing)
Sanding Kit
Microtip Scissors
Wishes:
Down the Middle (pg. 35)
D1388 Card Chater - Christmas
B1361 Tannenbaum
Workshop Weekend: Flip Flaps
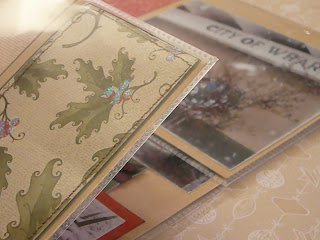
In November I held a Flip Flap Workshop. What are Flip Flaps, you are asking? They are Memory Protectors that you can attach to a 12x12 scrap page. The Flip Flaps have a stong adhesive that will endure the endless opening and closing of the a page. they come in 6x12; 4x12; and 8x12. You can use them in various combinations. We created 6 12x12 pages. When combined using the Flip Flaps, it will end up being 2 pages in your Memory Album.
This is the Right side. As you can see it looks like one page. But when opened it reveals 2 additional pages. One solid 12 x 12 with 6 inches on top and 6 inches on bottom.


This is the Left Side. Again it looks like one 12x12 page. But when opened it reveals 2 additional pages.


We even did a little sewing on each page!!!
Products Used:
Mistletoe Level 2 Paper Packet
EXCLUSIVE Mistletoe Workshop Kit:
Acrylix Stamp Set "All The Best"
Creative Basic: Mistletoe Collection
Bamboo Cardstock
New England Ivy Cardstock
Memory Protector Flip Flaps
Cocoa Grosgrain Ribbon
Opaques: Pearl
Mistletoe Level 2 Assortment
Sparkles: Red
Sparkles: Red
Prisma Glitter
Bonding Memories Glue Pen
Cutting Knife
Versa mat
Chocolate Ink
Chocolate Ink
Subscribe to:
Posts (Atom)


